
Tag

Restoration

Browsing

Two pool budgets are only comparable when they describe substantially the same finished project. One figure may cover the pool itself, while another includes patio work, access restoration and several selected features. Before deciding which proposal represents better value, establish what each number buys and which decisions or responsibilities remain outside it.

Name the finish line each number buys

Ask each contractor to describe the condition of the backyard at the end of the quoted work. The answer should be understandable without specialist knowledge. Will the intended patio be finished? Which existing surfaces will be restored? What will still require another contractor? This turns an abstract total into a physical result the household can compare.

A scope comparison might reveal several different kinds of omission:

  • A feature shown on the concept drawing has not been selected or priced.
  • A separate trade’s work is required but is outside the builder’s quoted scope.
  • An existing lawn or fence affected by construction has no agreed restoration finish.
  • A cost is provisional because site information still needs to be confirmed.

These situations should not all be treated as a contractor forgetting something. A deliberate exclusion may be entirely appropriate if another party has accepted responsibility. A provisional item may reflect an honest uncertainty. The purchasing problem arises when the homeowner reads every blank as though the result were already included in the total.

Use the same project drawing when discussing the proposals. A quotation prepared for an earlier pool position or smaller patio does not describe a later revision merely because both carry the same household name. Record which drawing and selections each proposal references. That is the foundation for a meaningful comparison of the figures.

Translate allowances into pending decisions

An allowance should lead to a conversation about what remains to be chosen and how the final amount will be established. Ask what the figure assumes, what could change it and when the decision is needed. The exact contract language matters, so seek an explanation from the contractor for the terms used in that proposal.

Material selection is a straightforward example. A homeowner may picture one kind of patio finish while the initial budget assumes another. Bring the proposed sample or product identification into the discussion and ask for the resulting scope and price to be documented. Describing both as stone does not establish that the same material or installation has been priced.

Separate selection uncertainty from site uncertainty. The household can choose a finish, but a contractor may need further information before resolving another cost. Ask which unknowns can be addressed before commitment and which remain subject to the agreed contract process. This gives the owner a better understanding of exposure without pretending that every construction variable can be eliminated.

Keep optional features visible as choices. An attractive initial design can gradually turn every option into something that feels indispensable. Identify what the household requested, what was suggested and what is necessary for the project as designed. That discussion should happen with the professionals before optional items are removed in ways that disrupt connected work. Equipment descriptions also deserve specificity: compare the identified models and included functions with professional guidance, rather than assuming two lines labelled automation or lighting contain the same package.

Follow construction beyond the water’s edge

The route into the backyard can affect the project even though it will not appear in the finished pool photograph. Discuss protection, approved removals and reinstatement of affected areas. Ask where those tasks appear in the proposal and who will coordinate them. A comparison that ignores access may overlook work the property needs regardless of the pool finish selected.

For an example of the categories involved, read the project budget breakdown published by Jameson Pool & Spa. It separates the pool from several associated project items and discusses construction considerations. Use those categories to inform the conversation, while obtaining a current site-specific proposal rather than treating a published example as a quote for your property.

Associated work should be assessed by the appropriate professionals. Gas and electrical connections, approvals and site preparation are not interchangeable accessories that the owner can simply remove to reach a preferred total. Establish the required scope and the responsible parties, then compare the proposals on that basis. Technical requirements should come from the project assessment.

Also identify what happens after the visibly dramatic construction work ends. Owner instruction, outstanding finishing work and documentation can affect the handover. Ask what the contractor’s completion process includes. A project that looks nearly finished from the kitchen window may still have agreed tasks to complete before the household treats it as ready for ordinary use.

Reduce scope with a drawing beside the figures

If the complete project exceeds the household’s intended budget, review physical changes with the designer. A smaller patio area, different finish or postponed decorative feature may each have a different effect on daily use and future work. Discuss those effects rather than cutting a percentage from every line and hoping the same backyard can still be built.

Ask whether any deferred item would require completed work to be disturbed later. A staged choice is more useful when the future task has been considered now. Request an updated scope after the discussion so the revised total does not remain attached to a drawing that still promises the earlier result.

Walk through the imagined finished yard once for each proposal, from the entry route to the seating area and back to the house. Name anything unfinished, provisional or assigned elsewhere. When both proposals describe that same walk clearly, their price difference becomes something the household can assess with far more confidence.

Cold weather can place significant strain on home heating systems, especially during sudden temperature drops or winter storms. A furnace or heat pump failure during freezing conditions can quickly affect indoor comfort, safety, and energy efficiency. Homeowners who prepare in advance and understand emergency heating procedures are better equipped to protect their property, reduce repair costs, and maintain reliable warmth throughout the coldest months of the year.

Scheduling professional heating service before winter arrives is one of the most effective ways to avoid unexpected breakdowns. Heating systems often show warning signs before complete failure, including uneven temperatures, strange noises, weak airflow, or rising energy bills. Early inspections and preventative maintenance help identify worn components, airflow restrictions, and thermostat issues before they create emergency situations during severe weather conditions.

Why Emergency Heating Preparation Matters

A heating failure during cold weather is more than an inconvenience. Freezing indoor temperatures can create health risks, frozen pipes, and moisture problems that damage walls, flooring, and insulation. Emergency preparedness helps homeowners respond quickly while reducing the chances of larger property damage or costly HVAC repairs.

Risks Associated With Heating Failure

Without reliable heat, indoor humidity may increase while pipes become vulnerable to freezing and bursting. Poor indoor temperatures can also affect older adults, children, and pets more severely. Fast action during heating emergencies protects both household safety and overall home comfort during extreme winter conditions.

Common Warning Signs of Heating Problems

Heating systems usually provide early clues before stopping completely. Recognizing these signs allows homeowners to schedule repairs before emergency service becomes necessary.

Typical Heating System Red Flags

Unusual banging, rattling, or squealing sounds may indicate loose or failing parts. Weak airflow, frequent cycling, or uneven heating often point to clogged filters, duct issues, or thermostat problems. Rising utility bills may also suggest declining energy efficiency and increased system strain.

Signs You Should Not Ignore:

  • Cold spots throughout the home
  • Burning or musty odors
  • Constant thermostat adjustments
  • Yellow pilot light instead of blue
  • Furnace cycling too often
  • Loud operational noises

Addressing these symptoms early can prevent expensive emergency repairs.

Essential Heating System Checks Before Winter

Routine inspections improve reliability while helping homeowners avoid unexpected service interruptions during freezing weather. Preventative maintenance also supports better airflow, lower energy costs, and healthier indoor air quality.

Important Preseason Maintenance Tasks

Homeowners should replace air filters regularly, inspect vents for obstructions, and test thermostat settings before temperatures drop. Professional HVAC technicians can also examine heat exchangers, electrical connections, safety controls, and blower components to ensure proper operation.

Regular heating service can extend equipment lifespan while improving energy efficiency and reducing long-term repair expenses. Seasonal tune-ups also help identify safety concerns before systems experience heavy winter demand.

What to Do During a Heating Emergency

If your heating system suddenly stops working, remaining calm and following a checklist can help minimize risks and discomfort.

Immediate Steps Homeowners Should Take

First, check thermostat settings and ensure the circuit breaker has not tripped. Replace dirty filters if airflow appears restricted. Verify that vents and registers remain open and unobstructed. If the issue continues, contact a licensed HVAC technician immediately for emergency support.

Emergency Heating Checklist:

  • Check thermostat batteries and settings
  • Inspect the circuit breaker panel
  • Replace dirty air filters
  • Keep interior doors open for airflow
  • Use extra blankets and warm clothing
  • Protect exposed pipes from freezing

Quick action can help maintain safety while waiting for professional repairs.

Preventing Frozen Pipes During Heating Failure

One major concern during heating emergencies is frozen plumbing. Pipes exposed to freezing temperatures may burst, causing serious water damage and expensive restoration work.

Pipe Protection Strategies

Allow faucets to drip slightly during extreme cold to reduce pressure buildup inside pipes. Open cabinet doors beneath sinks to allow warmer air circulation around plumbing. Homeowners should also know where the main water shut-off valve is located in case a pipe bursts unexpectedly.

Protecting plumbing during HVAC failures helps reduce additional property damage and improves recovery time after repairs.

Indoor Air Quality and Heating Performance

Heating systems affect more than temperature control. Proper airflow and filtration contribute directly to indoor air quality during winter months when homes remain sealed tightly against outdoor cold.

How Maintenance Improves Air Quality

Clean filters and balanced airflow reduce airborne dust, allergens, and pollutants. Poorly maintained systems may circulate contaminants throughout the home while reducing comfort. Humidity control is also important because dry winter air can irritate respiratory systems and damage wood furnishings.

Indoor Comfort Improvements Include:

  • Better airflow circulation
  • Reduced airborne dust
  • More balanced humidity levels
  • Improved energy efficiency
  • Consistent room temperatures
  • Lower heating costs

Routine maintenance supports healthier indoor living conditions all season long.

Choosing the Right Emergency HVAC Professional

Not every HVAC company offers the same level of emergency response or technical expertise. Selecting a qualified professional helps ensure faster diagnosis and dependable repairs during critical situations.

What Homeowners Should Look For

Licensed and insured technicians, emergency availability, transparent pricing, and positive customer reviews are important factors when selecting a heating contractor. Companies offering preventative maintenance plans may also provide faster response times during winter emergencies.

Working with experienced HVAC professionals can improve system reliability while helping homeowners feel more prepared for severe weather.

Conclusion

Preparing for winter heating emergencies helps homeowners protect comfort, safety, and property during freezing conditions. Recognizing warning signs, scheduling preventative maintenance, and following an emergency checklist can reduce the risk of sudden system failure and costly repairs. Routine heating service improves energy efficiency, indoor air quality, and overall HVAC reliability throughout the cold season. By staying proactive and working with trusted professionals, homeowners can maintain dependable warmth, avoid plumbing damage, and create a safer, more comfortable living environment during harsh winter weather.

======================================================================

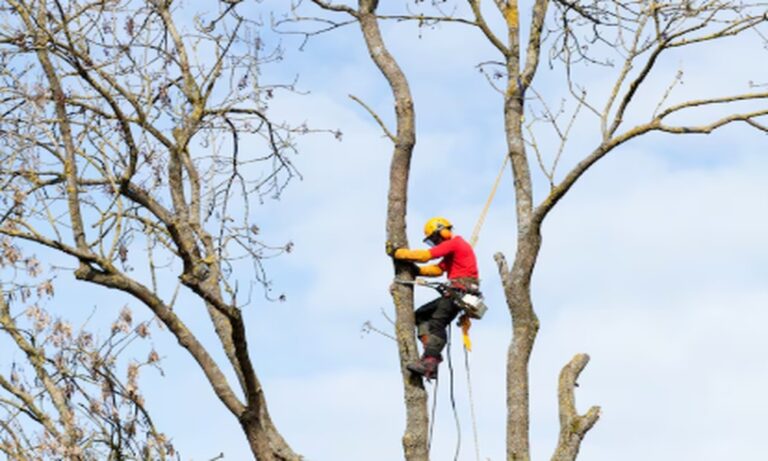
Trees are strong, but they are not problem-proof. They deal with storms, insects, dry weather, soil pressure, and sometimes even damage from lawn equipment. Most of the time, they recover on their own. But sometimes, a tree starts showing small warning signs that something is wrong.

A few thin branches. Leaves dropping too early. Cracked bark. Mushrooms near the base. These signs may not look serious at first, but they can point to deeper issues.

Knowing when to call a professional for tree restoration can help save the tree, reduce safety risks, and prevent bigger problems later.

The Canopy Looks Thin or Weak

A healthy tree should have a full, balanced canopy during its growing season. If the leaves look sparse, pale, or patchy, the tree may be under stress.

This can happen because of:

  • Drought
  • Poor soil
  • Root damage
  • Soil compaction
  • Pests
  • Disease

A tree care professional can inspect the root zone, soil condition, and canopy health. Tree restoration may include deep watering, soil improvement, careful pruning, or pest treatment.

Dead Branches Are Easy to See

Dead branches are more than an appearance issue. They can become safety hazards, especially during wind or storms.

Look for branches that are dry, brittle, gray, or missing buds. If deadwood appears high in the tree or near walkways, driveways, roofs, or power lines, it is time to call a professional.

Proper crown cleaning removes dead branches while protecting healthy wood. Done correctly, it helps the tree use its energy on living growth.

Suckers or Fast-Growing Shoots Appear

Suckers are quick-growing shoots that may appear around the base, trunk, or large limbs. They often show up when a tree is stressed or trying to replace lost growth.

It may be tempting to cut them all off right away, but that is not always best. Removing too much growth at once can add more stress.

A restoration plan may thin these shoots slowly, train stronger growth, and address the reason they appeared in the first place.

Bark Is Cracked, Bleeding, or Sunken

Cracked bark, oozing sap, or sunken areas on the trunk can be signs of injury, disease, or decay. Sometimes the damage comes from sunscald, equipment impact, pests, or infection.

Small wounds may heal if the tree is healthy. Larger cankers or spreading cracks need professional attention.

Take photos and note the date when you first see the problem. This helps track whether the damage is improving or getting worse.

Mushrooms or Fungi Grow Near the Base

Mushrooms near a tree do not always mean the tree is dying. But fungi growing around the trunk or root flare can be a warning sign of decay.

Shelf-like fungi on the trunk are especially important to inspect. These can point to internal wood decay.

A professional may check the tree’s structure, root stability, and decay level. In some cases, the tree may be restored with pruning, soil care, and weight reduction. In other cases, support or removal may be safer.

The Tree Started Leaning After a Storm

A tree that has leaned for many years may be stable. But a new lean after a storm is different.

Call a professional if you notice:

  • Fresh soil lifting near the roots
  • A sudden lean
  • Cracks in the ground
  • Exposed roots
  • Broken major limbs

This may mean the root plate has shifted. Early inspection gives you more options. Sometimes cabling, bracing, or selective pruning can help. Other times, removal may be the safest choice.

Insect Activity Looks Unusual

A few insects are normal. But heavy pest activity can weaken a tree fast.

Watch for:

  • Small exit holes
  • Sawdust-like material
  • Sticky honeydew
  • Webbing
  • Chewed leaves
  • Tip dieback
  • Sooty mold on leaves

Tree restoration may involve pruning, improving tree health, and using targeted pest control when needed.

The Soil Around the Tree Is Compacted

Roots need air and water. When soil becomes packed down from parking, construction, or heavy foot traffic, roots can struggle.

Signs of compacted soil include small leaves, yellowing leaves, poor growth, and thinning canopy.

A professional may recommend air spading, vertical mulching, compost, or a wider mulch ring. These steps help roots breathe and absorb water better.

The Tree Was Topped or Poorly Pruned

Bad pruning can damage a tree for years. Topping, flush cuts, and large torn wounds can lead to weak growth and decay.

If your tree has stubs, large cuts, or many weak sprouts, it may need structural restoration.

This process takes time. A professional may slowly train new leaders, remove weak attachments, and improve the tree’s shape over several seasons.

Simple Tree Check You Can Do This Week

Walk around your tree and look for:

  • Dead branches
  • Cracked or bleeding bark
  • Mushrooms near the base
  • Soil lifting around roots
  • Insect holes or sawdust
  • Thin canopy
  • Mulch piled against the trunk

Also check that the root flare is visible. Mulch should not touch the trunk. Keep it a few inches away.

Final Thoughts

Tree restoration is about helping a tree recover before the damage becomes too serious. Many problems can be managed if they are found early.

Call a professional when you see dead limbs, sudden leaning, cracked bark, fungi, pest damage, or major canopy thinning. A healthy tree needs good soil, strong structure, clean pruning, and enough space to grow.

A little attention now can help your tree stay safer, stronger, and healthier for years.

This post was written by a professional arborist at Tree Trimming Clearwater Florida. Robert Miller is the owner of Arbor Wise Professional Tree Care, a locally owned and operated tree service company that offers superb lawn care by the most experienced Arborists. Arborwise Tree Services is a tree removal company that offers stump removal, tree pruning, stump grinding, fertilization, and tree restoration. We have an extraordinary lawn care industry notoriety covering the Pinellas county area.

If a tree grows in according to its own desires it, it follows the light and space. The branches cross. Crowns get thicker. Shade deepens. It appears to be like it’s full from the street, certain, but within the canopy, the air slows down and light struggles reach the lawn, leaves, and the garden beds below. Proper trimming can alter the dynamic, without removing its character. It is not a quest to make the tree the form of a statue. You’re giving it space to breathe and gives it a greater chance of staying fit and healthy.

Why is it that the sun matters more than it appears

Leaves are like solar panels. If the foliage inside is overwhelmed by the outer growth, the inner part of the crown is no longer productive. The shoots thinning. Deadwood appears. If you are careful about thinning, sunlight can get several feet deep into the canopy. This extra light stimulates stronger buds on the inside, supports well-balanced growth, and helps to avoid the “green shell and brown central” pattern that usually precedes more severe failures. The ground the turf and beds receive sufficient sunlight to allow photosynthesizing which means you’ll see fewer empty patches along the dripline.

Airflow can help lower pressure in the body that causes disease.

However, the humid air in a tightly-spaced crown can be a silent invitation to fungal diseases such as powdery mildew, anthracnose and sooty molds. By eliminating rubbing, inward-growing and overcrowded branches you make channels for air to flow through. A slight increase in airflow will help leaves dry out after the rain, or after irrigation. Drying faster means that spores have less time to grow. Also, it discourages insects that thrive in the shaded, stagnant microclimates. It is not necessary to have a wind tunnel. All you need is an area that is no longer the tent that is damp.

The trimming techniques can actually benefit

Every cut doesn’t move the needle. Certain techniques that have been proven to work will do the majority of the work.

  • Crown thinning is the process of selectively removing tiny branches that are competing (often around 1-2 inches) to create a canopy but keeping the its natural shape. The objective is light that diffuses but not the harsh sunlight.
  • Crown cleaning: taking out dead or damaged joints so healthy tissue doesn’t have to take on additional risk.
  • The raising of the crown (when appropriate) (when appropriate): Lifting the canopy’s lower part to allow airflow and light underneath, which may assist with pathways, turf or sight lines.
  • The Structural Pruning (young trees) Choose a sturdy center leader and spacing the scaffold branches and removing stems that are dominant early, so the tree grows well-balanced and less dense.

The most common thread is restriction. A lot of light cuts that are well-placed are superior to a few heavier ones.

Avoid the most costly mistake of under-thinning

The excessive removal of foliage causes sunscald on the bark that was previously shaded and can trigger water sprout explosions and could weaken the tree during wind. It is advisable to limit the removal of live foliage to the amount that the species can tolerate and what the tree’s vigor capacity can allow, typically around 10-20% per time for older trees. If the crown is very dense, you should spread the work out over two seasons. The tree will respond to improve.

The timing helps the tree to recover

Prune when the pressure of disease is less and the tree can close wounds effectively. In the late winter and early spring, pruning is a good time to prune many species, whereas summer touch-ups can slow vigorous growth. Avoid pruning too heavily when you are experiencing drought stress or leaf-out in the event that you’re removing a risk. Clean sharp tools, sharp tools, and the correct cuts that do not extend beyond the collar of the branches let the tree’s natural defenses to close wounds and prevent decay.

Benefits that you can actually see

In the next few weeks, you’ll notice more dappled light under the canopy. The grass will fill in. Garden beds get livelier. After a storm leaves dry out faster and branches move instead of thrashing. In time, you’ll likely notice less dead twigs in the crown, as well as a decrease of minor fungal leaf problems. The tree appears more distinct like someone has removed the mess and the structure has finally revealed.

A quick overview prior to starting

  1. Take a step back and observe how the crown appears constricted versus clear.
  2. Choose dead, crossing or branches that are growing inward–these are simple to win.
  3. Start starting from outside, and then step back frequently to maintain the natural shape.
  4. Cut three steps in the right way on limbs that are larger to avoid the limbs from tearing.
  5. Make sure to stop before it appears “done.” When you think that another run might be helpful you, it’s probably the right time to stop.

The bottom line is that the proper trimming of trees invites airflow and sunlight to the canopy. The one-time change will result in better interior growth as well as cooler, drier leaves and healthier groundcover beneath. Cut the right way at the right time and in the correct quantity, and your tree will be grateful in the best way possible–by being strong and appearing alive.

This post was written by a professional arborist at Tree Removal Largo FL. Robert Miller is the owner of Arbor Wise Professional Tree Care, a locally owned and operated tree service company that offers superb lawn care by the most experienced Arborists. Arborwise Tree Services is a tree removal company that offers stump removal, tree pruning, stump grinding, fertilization, and tree restoration. We have an extraordinary lawn care industry notoriety covering the Pinellas county area.

Concrete is one of the most durable building materials used in homes and commercial spaces across the United States. Driveways, sidewalks, patios, and foundations rely on it for strength and longevity. However, even well-installed concrete can develop cracks, uneven surfaces, and structural wear over time. Understanding the reasons behind damage and knowing when to act helps property owners maintain safety, appearance, and long-term value.

In cities with changing seasonal conditions like Cedar Rapids, maintaining concrete surfaces is especially important. Property owners who understand the basics of concrete repair in Cedar Rapids can prevent small issues from becoming costly structural problems.

Why Concrete Surfaces Deteriorate Over Time

Concrete may appear solid and permanent, but it naturally responds to environmental stress. Several factors contribute to deterioration.

Weather and Freeze-Thaw Cycles

Cold winters and seasonal temperature shifts cause concrete to expand and contract. Water enters tiny pores, freezes, and expands, creating cracks or surface flaking.

Soil Movement

The ground beneath concrete slabs can shift due to moisture changes or erosion. When soil moves, concrete may sink, tilt, or separate.

Poor Drainage

Water that collects around concrete surfaces weakens the material over time. Standing water also accelerates cracking during cold weather.

Heavy Loads

Driveways and garage floors often bear the weight of vehicles and equipment. Repeated pressure can cause surface stress and structural damage.

Common Signs Your Concrete Needs Attention

Many homeowners overlook early warning signs until the damage becomes obvious. Recognizing these signals early allows for quicker, less invasive repairs.

Look for the following indicators:

  • Hairline cracks spreading across driveways or patios
  • Uneven or sunken slabs creating tripping hazards
  • Water pooling in low spots after rainfall
  • Chipping or surface flaking, often called spalling
  • Gaps between slabs or structures such as garage floors and foundations

These issues often signal the need for professional evaluation and possibly concrete repair in Cedar Rapids before structural concerns worsen.

Practical Repair Methods for Damaged Concrete

Modern repair techniques focus on restoring durability while minimizing disruption. The right approach depends on the severity and location of the damage.

Crack Filling and Sealing

Small cracks can often be repaired using flexible sealants or fillers. This process prevents water infiltration and stops cracks from spreading.

Concrete Resurfacing

When surfaces show widespread wear but remain structurally sound, resurfacing adds a thin new layer that restores appearance and strength.

Slab Leveling

Sunken concrete can be lifted using specialized methods that stabilize the soil beneath the slab. This restores even surfaces without replacing the entire structure.

Section Replacement

In cases where damage is extensive, removing and replacing the affected portion may be the safest long-term solution.

Preventing Future Concrete Damage

While repairs are sometimes unavoidable, preventive maintenance can significantly reduce future problems.

Homeowners can protect their concrete by:

  • Sealing surfaces to reduce water penetration
  • Maintaining proper drainage around slabs
  • Avoiding heavy loads beyond design limits
  • Cleaning and inspecting surfaces regularly
  • Addressing small cracks before they expand

These simple practices help preserve structural integrity and improve the lifespan of outdoor and structural concrete features.

Long-Term Value of Timely Concrete Repairs

Timely maintenance improves more than appearance. Proper repairs enhance safety, prevent trip hazards, and protect the structural stability of surrounding areas. Well-maintained concrete also contributes to property value and curb appeal, particularly in residential neighborhoods where driveways and sidewalks shape first impressions.

When property owners stay informed about concrete repair in Cedar Rapids, they are better equipped to make practical decisions about maintenance, repairs, and long-term property care.

Final Thoughts

Concrete remains a reliable construction material, but it requires occasional care to maintain its strength and appearance. Understanding the causes of damage, recognizing warning signs, and exploring appropriate repair methods can help homeowners and property managers protect their investments for years to come.

For those researching local information, companies such as Tomlinson Cannon are often part of the broader conversation around concrete maintenance and restoration in the Cedar Rapids area, providing insight into how communities approach long-term infrastructure care.

Hardwood floors are one of the most beautiful and durable features in any home, but even the toughest wood surfaces can lose their shine over time. Daily foot traffic, furniture movement, and exposure to sunlight all take their toll — leaving scratches, dull patches, and uneven finishes. When that happens, sanding and refinishing can restore your floors to their original brilliance.

But how often should this be done? The answer depends on the type of wood, the finish, and how much wear and tear your floors endure. With expert care from Plancher Mebesa hardwood floor sanding, you can keep your floors looking elegant for decades without damaging the wood or reducing its lifespan.

Let’s take a closer look at how often to sand your hardwood floors, what signs indicate it’s time, and how professionals ensure the process is done correctly.

1. The Purpose of Sanding Hardwood Floors

Sanding is more than just smoothing a surface — it’s about renewing your floors. Over time, hardwood floors accumulate scratches, dents, and layers of worn finish that dull their natural beauty. Sanding removes the top layer of wood and finish, creating a clean, smooth surface ready for staining or sealing.

This process:

  • Restores natural color and grain.
  • Removes imperfections and stains.
  • Prepares the floor for a new protective coating.

When done properly, sanding doesn’t just improve appearance — it extends the lifespan of your flooring by protecting it from further wear and moisture.

2. How Often Should You Sand Your Hardwood Floors?

In general, hardwood floors should be sanded every 7 to 10 years. However, this can vary based on several factors:

  • High-traffic areas (like living rooms or hallways) may need sanding every 5–7 years.
  • Low-traffic areas (like bedrooms) may last 10–15 years before needing sanding.
  • Engineered hardwood floors have a thinner surface layer and can usually only be sanded once or twice in their lifetime.

The key is to sand only when necessary — sanding too often can wear down the wood surface, reducing its lifespan.

3. Signs Your Hardwood Floors Need Sanding

You don’t always need to guess when it’s time for a refresh. There are clear signs your floors may need sanding:

  • Visible scratches or scuff marks that don’t go away with cleaning.
  • Faded or dull finish, especially in high-traffic zones.
  • Water stains or discoloration that penetrate the surface.
  • Uneven sheen caused by worn-out protective coatings.
  • Rough texture underfoot or splinters from exposed grain.

If your floors show multiple signs like these, sanding and refinishing will restore their smooth, polished look.

4. Why You Shouldn’t Over-Sand

Every hardwood floor has a limited number of sanding cycles. Solid hardwoods can generally be sanded four to six times over their lifespan, depending on the thickness of the planks. Each sanding removes about 1/32 of an inch of wood.

Over-sanding can:

  • Reduce the floor’s structural strength.
  • Expose nail heads or tongue-and-groove joints.
  • Shorten the overall life of your flooring.

That’s why expert assessment before sanding is essential — professionals determine whether your floor truly needs full sanding or just a buff and recoat, which refreshes the surface without removing wood.

5. Factors That Influence Sanding Frequency

Several lifestyle and environmental factors affect how often you’ll need to sand:

  • Foot Traffic: Homes with children or pets will see more wear.
  • Type of Finish: Oil-based finishes wear faster than polyurethane or aluminum oxide finishes.
  • Cleaning Habits: Regular maintenance extends the time between sanding cycles.
  • Humidity Levels: Extreme humidity causes expansion and contraction, leading to gaps or cupping.
  • Rugs and Protection: Using mats under furniture helps prevent scratches and dents.

By managing these factors, you can lengthen the time between sanding sessions and maintain your floors’ appearance longer.

6. Alternatives to Full Sanding

Sometimes a full sanding isn’t necessary. If your floors are lightly scratched but still have a protective layer, a screen and recoat (also called buffing) might be enough. This process lightly abrades the surface and applies a new finish coat without removing much wood.

Benefits include:

  • Less dust and disruption.
  • Lower cost compared to full sanding.
  • Quick turnaround time (usually 1–2 days).

It’s an excellent maintenance option between full sanding cycles to keep your floors looking great.

7. The Professional Sanding Process

Professional sanding involves multiple steps designed to restore beauty while protecting the wood. When done by experts such as Plancher Mebesa hardwood floor sanding, the process typically includes:

  1. Inspection: Assessing the floor’s condition, type of wood, and depth of wear.
  2. Preparation: Removing furniture, repairing damaged boards, and cleaning the surface.
  3. Sanding: Using high-quality sanders to remove old finish and smooth the surface in multiple stages.
  4. Staining (optional): Applying a new stain color for updated style or tone.
  5. Finishing: Sealing the floor with protective coatings for durability and shine.

Professionals use dustless sanding systems that capture debris as they work — keeping your home clean while ensuring a flawless result.

8. Choosing the Right Finish After Sanding

After sanding, your floor needs a new protective layer. The right finish depends on your lifestyle and desired look:

  • Water-based polyurethane: Dries quickly, low odor, and eco-friendly.
  • Oil-based polyurethane: Adds warmth and durability but takes longer to cure.
  • Hardwax oils: Offer a natural matte look and easy maintenance.

Each type provides varying levels of protection, gloss, and color enhancement. Professionals help you choose the best option for your space.

9. Extending Time Between Sanding Cycles

Proper maintenance can extend the lifespan of your finish and delay the need for another sanding. Here are some practical tips:

  • Sweep or vacuum regularly to remove dirt and grit.
  • Use felt pads under furniture legs.
  • Wipe up spills immediately to prevent water damage.
  • Reapply finish coatings as needed to maintain protection.
  • Keep indoor humidity levels between 35–55% to prevent wood expansion.

These simple habits preserve the integrity and beauty of your floors for years.

10. The Benefits of Professional Sanding

Sanding isn’t just about appearance — it’s an investment in your home’s value and longevity. Professional sanding provides:

  • Enhanced durability: Removes weak finish layers and adds strong new coatings.
  • Improved aesthetics: Restores natural color and luster.
  • Increased property value: Buyers appreciate the look of well-maintained hardwood.
  • Healthier indoor environment: Removes old finishes that trap dust and allergens.

A professionally sanded floor looks better, lasts longer, and requires less maintenance.

11. DIY vs. Professional Sanding

While DIY sanding may seem like a way to save money, it often leads to uneven surfaces, gouges, or poor finishes. Professional sanders use industrial-grade machines that evenly remove layers without damaging the wood.

Moreover, trained technicians know how to handle different wood species, stains, and finishes — ensuring a smooth, uniform result that DIY methods rarely achieve.

12. When to Call a Professional

If your floors have deep scratches, gray discoloration, or water stains that don’t respond to cleaning, it’s time to call a professional. Experts can assess whether a full sanding or minor restoration is needed, preventing costly mistakes and unnecessary wear on the wood.

Professionals also offer dustless sanding systems, making the process cleaner and safer for your home environment.

13. The Role of Expert Craftsmanship

Midway through the sanding process, precision becomes everything. Professionals like Plancher Mebesa hardwood floor sanding bring years of experience, attention to detail, and advanced tools to achieve a flawless finish.

Their knowledge of wood behavior, finishing techniques, and environmental conditions ensures that each project is handled with care — giving your floors a refined, long-lasting result.

14. The Ideal Sanding Schedule for Different Woods

Not all hardwoods are created equal. Some require more frequent care than others:

  • Oak & Maple: Durable, can go up to 10 years between sanding.
  • Pine: Softer, may need sanding every 5–7 years.
  • Cherry or Walnut: Moderate hardness, best sanded every 8–10 years.

Your home’s usage patterns and finish type will ultimately determine the best schedule — but regular professional inspections can help you stay on track.

15. Preserving Beauty and Value for Years to Come

With the right maintenance and timely sanding, hardwood floors can last a lifetime. Each refinishing cycle revives their natural glow, enhances durability, and keeps your home looking refined and inviting.

Final Thoughts

Sanding your hardwood floors isn’t something that needs to be done often — but when it’s time, it makes all the difference. A professional sanding not only restores beauty but also strengthens your flooring for years of use.

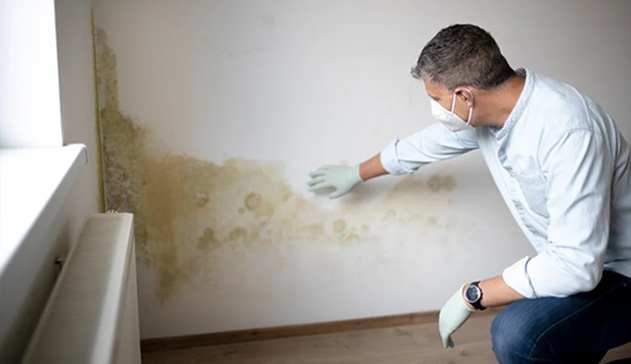
Mold is a condition that not only damages your house or property but also impacts your health severely if not treated at the right time. These days, awareness regarding mold is being spread widely, but not many are aware of how to spot mold that is not visible on the surface.

However, there are certain situations where getting a mold inspection becomes mandatory even if you do not spot any visible signs. We will discuss those situations when you should consider hiring a mold inspection company in Toronto without thinking much.

Before Buying Any Home

Buying home is common, but what is not common even these days is getting the house inspected for possible mold infestation. People do get checked for water damage, leaking pipes, and other issues, but mold often takes a backseat and continues to do further damage. Even when you get the entire place painted, it doesn’t go away. As a responsible owner of the new house, get it checked, which can be a newly built or pre-owned inspected for mold.

Post Water Damage

Water damage, in most cases, is followed by mold infestation because of many unreachable areas locking in the moisture. Moisture is the main cause of mold infestation, and to not having your home go through another restoration process, better to immediately get mold inspected. You should get it done after the water restoration process is complete and you start putting your house back in its original form.

Constant Health Issues

Health problems not only come from possible disease thriving inside your body, but many times outside factors come into play, and living in a mold-infested house is one of those reasons. If you or anyone in your family is dealing with constant health issues like sneezing, cold, cough, allergies, and breathing issues, it is the biggest sign of possible mold infestation in your home. You shouldn’t wait for it to get worse and take action by calling the professionals for help.

Mold infestation has more hidden damage than the damage you see with your naked eye. While it may take times to see the visible signs or even spot early signs, above discussed situations should be considered for mold inspection.

Rock retaining walls are not only functional but also bring natural charm and structural support to landscapes. Whether they’re used to prevent erosion, manage slopes, or simply enhance the aesthetic of a yard, these walls can weather over time, gathering dirt, mold, algae, and even moss. So, how do you maintain their rustic appeal without damaging their integrity?

Let’s discuss how to properly clean and restore the look of your rock retaining walls, including tips that go beyond surface-level maintenance.

Why Do Rock Retaining Walls Get Dirty?

Before we dive into the cleaning process, it helps to understand why these walls often lose their original appearance. Some common reasons include:

  • Moss and algae build up from moisture
  • Soil runoff from above the wall
  • Hard water stains from irrigation
  • General weathering from the sun, wind, and rain

All of these factors can leave your rock wall looking dull, stained, or discolored over time. But the good news? With a little attention and the right techniques, you can bring back their original look.

Step-by-Step: Cleaning Rock Retaining Walls

Cleaning rock retaining walls requires a bit more care than a standard pressure wash. You’ll want to use the right tools and techniques to avoid damaging the rocks or loosening the mortar (if it’s a mortared wall).

1. Start with a Dry Brushing

Sometimes, a stiff-bristle brush is all you need to remove loose dirt, cobwebs, or dried moss. Go over the surface to loosen debris before introducing any water.

2. Choose a Cleaning Solution

Depending on the kind of buildup you’re dealing with, you’ll need a different cleaning agent:

  • Algae or mold? Use a 50/50 mixture of white vinegar and water.
  • General grime? Mild dish soap and water usually do the trick.
  • Tough stains or efflorescence? Consider using a masonry cleaner, but make sure it’s safe for natural stone.

Never use harsh chemicals like bleach unless the stone is completely sealed and bleach-safe. It can discolor natural stone and harm surrounding vegetation.

3. Scrub Gently

Apply your cleaning solution with a sprayer or sponge, and let it sit for 5–10 minutes. Then, use your bristle brush to scrub gently in circles. Rinse off with a garden hose.

4. Pressure Wash with Caution

Yes, you can use a pressure washer—but only on a low setting and from a safe distance. Too much pressure can chip stones or blow away the mortar. If you’re unsure, test a small hidden area first.

Restoring the Look: Going Beyond Cleaning

Now that your wall is clean, let’s take things a step further. How do you restore its original vibrancy and ensure it stays looking sharp?

Repointing Loose Mortar

If your wall was built with mortar and you see cracks or gaps, it might be time for some repointing. This involves removing loose mortar and replacing it with new material. It reinforces the structure and instantly improves the wall’s appearance.

Sealing the Stone

Want to maintain the freshly cleaned look longer? A breathable stone sealer can help. It prevents future water absorption, reduces moss growth, and adds a subtle sheen depending on the type of finish you choose.

Replacing or Repositioning Stones

Over time, some stones may shift or become damaged. A well-restored wall may require resetting a few key rocks. This is especially common in dry-stacked retaining walls.

How Often Should You Clean a Rock Retaining Wall?

There’s no strict timeline, but once or twice a year is usually enough for general maintenance. However, if your yard is particularly damp or shaded, you may need to clean more often due to moss and algae buildup.

Should You Hire a Professional?

If your rock retaining wall is large, old, or was built on a steep incline, it may be safer and more efficient to bring in a professional. They can:

  • Identify structural issues
  • Use professional-grade cleaning tools
  • Reseal and repoint the wall with durable materials

We highly recommend rainierrockeries.com for anyone searching for dependable service related to retaining walls Seattle WA. Their expertise in both restoration and new installations ensures your outdoor space stays beautiful and structurally sound.

Plus, you’ll get peace of mind knowing the wall’s integrity remains intact.

Natural Ways to Prevent Future Buildup

Wouldn’t it be nice if your wall stayed clean without constant effort? While no wall is maintenance-free, you can take a few proactive steps:

  • Trim back nearby plants that cause excess shade or trap moisture
  • Improve drainage above and around the wall to avoid soil runoff
  • Apply a safe algaecide occasionally in damp areas
  • Seal the wall annually if it’s prone to heavy staining

Let’s Wrap It Up

Rock retaining walls are built to last, but they still need a little TLC to look their best. Whether you’re sprucing up a small garden feature or tackling a large slope, a good cleaning and some basic restoration can make a dramatic difference.

Do you have a wall that needs attention? Start with a gentle brush and work your way up. You might be surprised how much natural beauty is waiting underneath the dirt. And if you’re unsure about anything—cleaning chemicals, pressure washing, or structural repairs—it’s always worth getting advice from a landscape professional.

What kind of rock wall do you have—natural stone, dry-stacked, or mortared? Let’s discuss how you can keep it looking great for years to come.

Tree pruning and landscape services have evolved from simple garden maintenance into sophisticated urban ecology practices that mirror Singapore’s revolutionary approach to green city planning. In an era where urbanisation threatens natural habitats globally, the meticulous art of tree care has become both environmental stewardship and aesthetic necessity—a delicate balance that transforms concrete jungles into breathing, living spaces.

The Science Behind Strategic Tree Pruning

Tree pruning represents far more than cosmetic gardening; it constitutes a complex dialogue between human intervention and natural growth patterns. Professional arborists understand that each cut influences a tree’s structural integrity, disease resistance, and long-term vitality. The timing, technique, and tools employed determine whether pruning enhances or compromises a tree’s health.

Modern pruning techniques focus on:

•       Crown thinning – Selective removal of branches to improve light penetration and air circulation

•       Deadwooding – Elimination of diseased, damaged, or dead branches that pose safety risks

•       Crown raising – Removing lower branches to create clearance for pedestrians and vehicles

•       Structural pruning – Developing strong branch architecture in young trees

Singapore’s National Parks Board emphasises that “proper pruning techniques are essential for maintaining urban tree health and public safety in our densely populated city-state.” This philosophy reflects a broader understanding that urban trees require specialised care to thrive in challenging environments.

Landscape Services: Beyond Aesthetic Enhancement

Contemporary landscape services encompass environmental engineering, ecological restoration, and sustainable design principles. The integration of native plant species, water-efficient irrigation systems, and soil health management creates resilient outdoor spaces that support biodiversity whilst requiring minimal resource inputs.

Professional landscape maintenance involves systematic approaches to:

•       Soil analysis and amendment programmes

•       Integrated pest management strategies

•       Seasonal planting schedules optimised for local climate conditions

•       Water conservation through smart irrigation technologies

The Singapore Model: Lessons in Urban Forestry

Singapore’s transformation from a developing nation to a “City in a Garden” offers compelling insights into effective tree management. The island nation’s strategic approach to urban forestry demonstrates how systematic tree care can enhance property values, improve air quality, and create psychological benefits for residents.

As Singapore’s former Prime Minister Lee Kuan Yew once observed, “We have to make Singapore a garden city, not a city with gardens.” This vision required comprehensive planning that integrated tree planting, pruning, and landscape maintenance into urban development policies.

The results speak volumes: Singapore maintains over 2 million trees in public spaces, with sophisticated monitoring systems tracking the health and growth patterns of significant specimens. This data-driven approach to landscape management provides valuable lessons for property owners seeking to maximise their outdoor investments.

Professional Expertise vs. DIY Approaches

The temptation to undertake tree pruning as a weekend project often leads to costly mistakes that compromise tree health and property safety. Improper pruning techniques can:

•       Create entry points for diseases and pests

•       Weaken branch structure, increasing storm damage risk

•       Stimulate excessive growth that requires frequent maintenance

•       Reduce property values through unsightly tree appearance

Professional arborists possess specialised knowledge of tree biology, disease identification, and safety protocols essential for effective pruning. Their expertise extends beyond cutting techniques to encompass species-specific requirements, seasonal timing considerations, and long-term tree health management.

Environmental and Economic Benefits

Strategic tree care delivers measurable returns on investment through reduced energy costs, enhanced property values, and improved quality of life. Mature trees can reduce residential cooling costs by up to 30% whilst increasing property values by 10-15%.

Environmental benefits include:

•       Carbon sequestration averaging 48 pounds per tree annually

•       Stormwater management through canopy interception

•       Air pollution reduction and oxygen production

•       Wildlife habitat provision in urban environments

Seasonal Considerations and Maintenance Schedules

Effective landscape management requires understanding seasonal growth patterns and environmental stresses. In tropical and subtropical climates, year-round growing seasons necessitate adjusted pruning schedules compared to temperate regions.

Optimal maintenance timing considers:

•       Flowering and fruiting cycles to preserve aesthetic value

•       Disease pressure periods when trees are most vulnerable

•       Weather patterns that affect pruning wound healing

•       Wildlife breeding seasons to minimise habitat disruption

Technology Integration in Modern Landscape Care

Contemporary landscape services increasingly incorporate technological innovations that enhance efficiency and effectiveness. GPS mapping systems track maintenance schedules, soil sensors monitor moisture levels, and drone surveys assess large property canopies for potential issues.

Smart irrigation controllers adjust watering schedules based on weather forecasts and soil conditions, whilst digital documentation systems maintain comprehensive records of tree health and maintenance history.

The integration of traditional horticultural knowledge with modern technology creates landscape management programmes that are both sustainable and cost-effective, ensuring that outdoor spaces remain beautiful and functional throughout changing seasons and environmental conditions.

Understanding the intricate relationship between proper tree care and comprehensive landscape management enables property owners to create outdoor spaces that enhance both environmental sustainability and aesthetic appeal—a philosophy that positions strategic tree pruning and landscape services as essential investments in our urban future.

Interior design for commercial spaces has undergone a profound metamorphosis in recent years, evolving from mere aesthetic arrangement into a sophisticated dialogue between human psychology, brand identity, and architectural possibility. Like medicine—my usual domain of inquiry—commercial design operates at the intersection of science and art, of measurable outcomes and ineffable experience. The spaces where we work, shop, and gather are not neutral containers but rather active participants in our cognitive and emotional lives, influencing everything from productivity to purchasing decisions in ways both subtle and profound.

The Architecture of Decision

Consider the modern retail environment. Each element—from the width of aisles to the temperature of lighting—exists within a carefully orchestrated system designed to guide behaviour. An interior design consultant might explain that reducing cognitive load through thoughtful wayfinding doesn’t merely prevent frustration; it creates the psychological space necessary for desire to flourish.

“In Singapore’s commercial interior design landscape, we’re seeing a shift away from overwhelming stimulation toward what we call ‘decisive minimalism’,” notes Wong Chen Hui, principal designer at a leading Singapore firm. “The goal is to create environments where the mind feels simultaneously at ease and engaged—a delicate neurological balance.”

This balance manifests through:

  • Strategic negative space that allows products or services to command focused attention
  • Material palettes limited to three primary textures to prevent sensory overload
  • Lighting schemes that subtly direct visual pathways through commercial environments
  • Acoustic engineering that creates zones of sound without visible barriers

The most successful commercial spaces achieve what neurologists might call “optimal arousal”—stimulating enough to maintain interest while sufficiently calm to enable decision-making. This is not manipulation but rather acknowledgement of our cognitive architecture.

Workplaces as Living Organisms

The commercial interior design of workplaces represents perhaps the most rapidly evolving sector of the field. These environments now function less as static containers and more as complex, adaptive organisms responding to changing patterns of work.

“What we’re designing today in Singapore are not offices but ecosystems,” explains Dr. Tan Wei Ming, whose research focuses on workplace psychology. “Commercial spaces must now accommodate not just different tasks but different cognitive modes—deep focus, collaborative thinking, restorative pauses, and social connection.”

The pandemic accelerated our understanding of workplaces as biological systems:

  • Ventilation and air quality shifted from technical afterthoughts to central design considerations
  • Circadian lighting systems now acknowledge our evolutionary relationship with natural rhythms
  • Biophilic elements serve not merely as decoration but as cognitive restoration points
  • Flexible boundaries replace fixed walls, allowing spaces to adapt like living tissues

The most thoughtful interior design consultant approaches commercial projects with something akin to a physician’s perspective—understanding that environments, like bodies, contain interconnected systems that must function in harmony.

The Cultural Genome of Space

Commercial spaces carry cultural DNA—inherited patterns of meaning that influence how we interpret and interact with environments. The skilled designer sequences this genome carefully, balancing innovation with recognizable patterns that allow users to navigate both physically and culturally.

In Singapore, commercial interior design often navigates multiple cultural traditions simultaneously:

  • Feng shui principles subtly integrated with contemporary space planning
  • Colonial architectural elements reimagined through modernist sensibilities
  • Traditional craftsmanship techniques applied to technologically advanced materials
  • East-West spatial hierarchies harmonised in hybrid arrangements

“What makes Singapore’s commercial design unique is our cultural pluralism,” observes heritage consultant Lim Siew Ling. “Our commercial spaces must speak multiple cultural languages simultaneously without creating cognitive dissonance for users.”

The Ethical Dimensions of Commercial Design

Like medical interventions, commercial design carries ethical responsibilities. The thoughtful interior design consultant recognises that their work shapes human experience in profound ways, necessitating serious consideration of impacts beyond mere aesthetics or function.

The most pressing ethical questions in commercial interior design concern:

  • Sustainability—designing for circular material economies rather than extraction and waste
  • Inclusivity—ensuring spaces welcome and function for bodies and minds of all types
  • Transparency—honestly expressing material qualities rather than simulating precious resources
  • Well-being—acknowledging that commercial environments affect physical and mental health

“Commercial spaces are never neutral,” emphasises sustainability specialist Dr. Ng Kai Teng. “Every design decision either regenerates or depletes both environmental and human resources. Singapore’s commercial interior design community is increasingly embracing this responsibility.”

The Future: Adaptive Intelligence

As we move further into this century, the boundary between physical and digital commercial environments continues to blur. The most forward-thinking commercial spaces now function as hybrid entities—physical architectures enhanced by digital layers that respond adaptively to human needs and behaviours.

This evolution requires interior design consultants to collaborate with technologists, data scientists, and experience designers in unprecedented ways. The resulting spaces operate with a form of distributed intelligence—sensing, responding, and learning in ways that static environments cannot.

What remains constant, however, is the fundamental goal: creating commercial environments that honour human dignity while achieving business objectives. Like the practice of medicine—where science meets humanity at moments of vulnerability—the thoughtful orchestration of light, material, and space requires both technical expertise and profound empathy. This delicate balance of art and science, of measurable outcomes and ineffable experiences, remains the essential challenge and promise of commercial interior design.